Installation
Welcome Window
Note
Available from the 1.8.1 version.
When you open project first time, you should see Welcome Window:
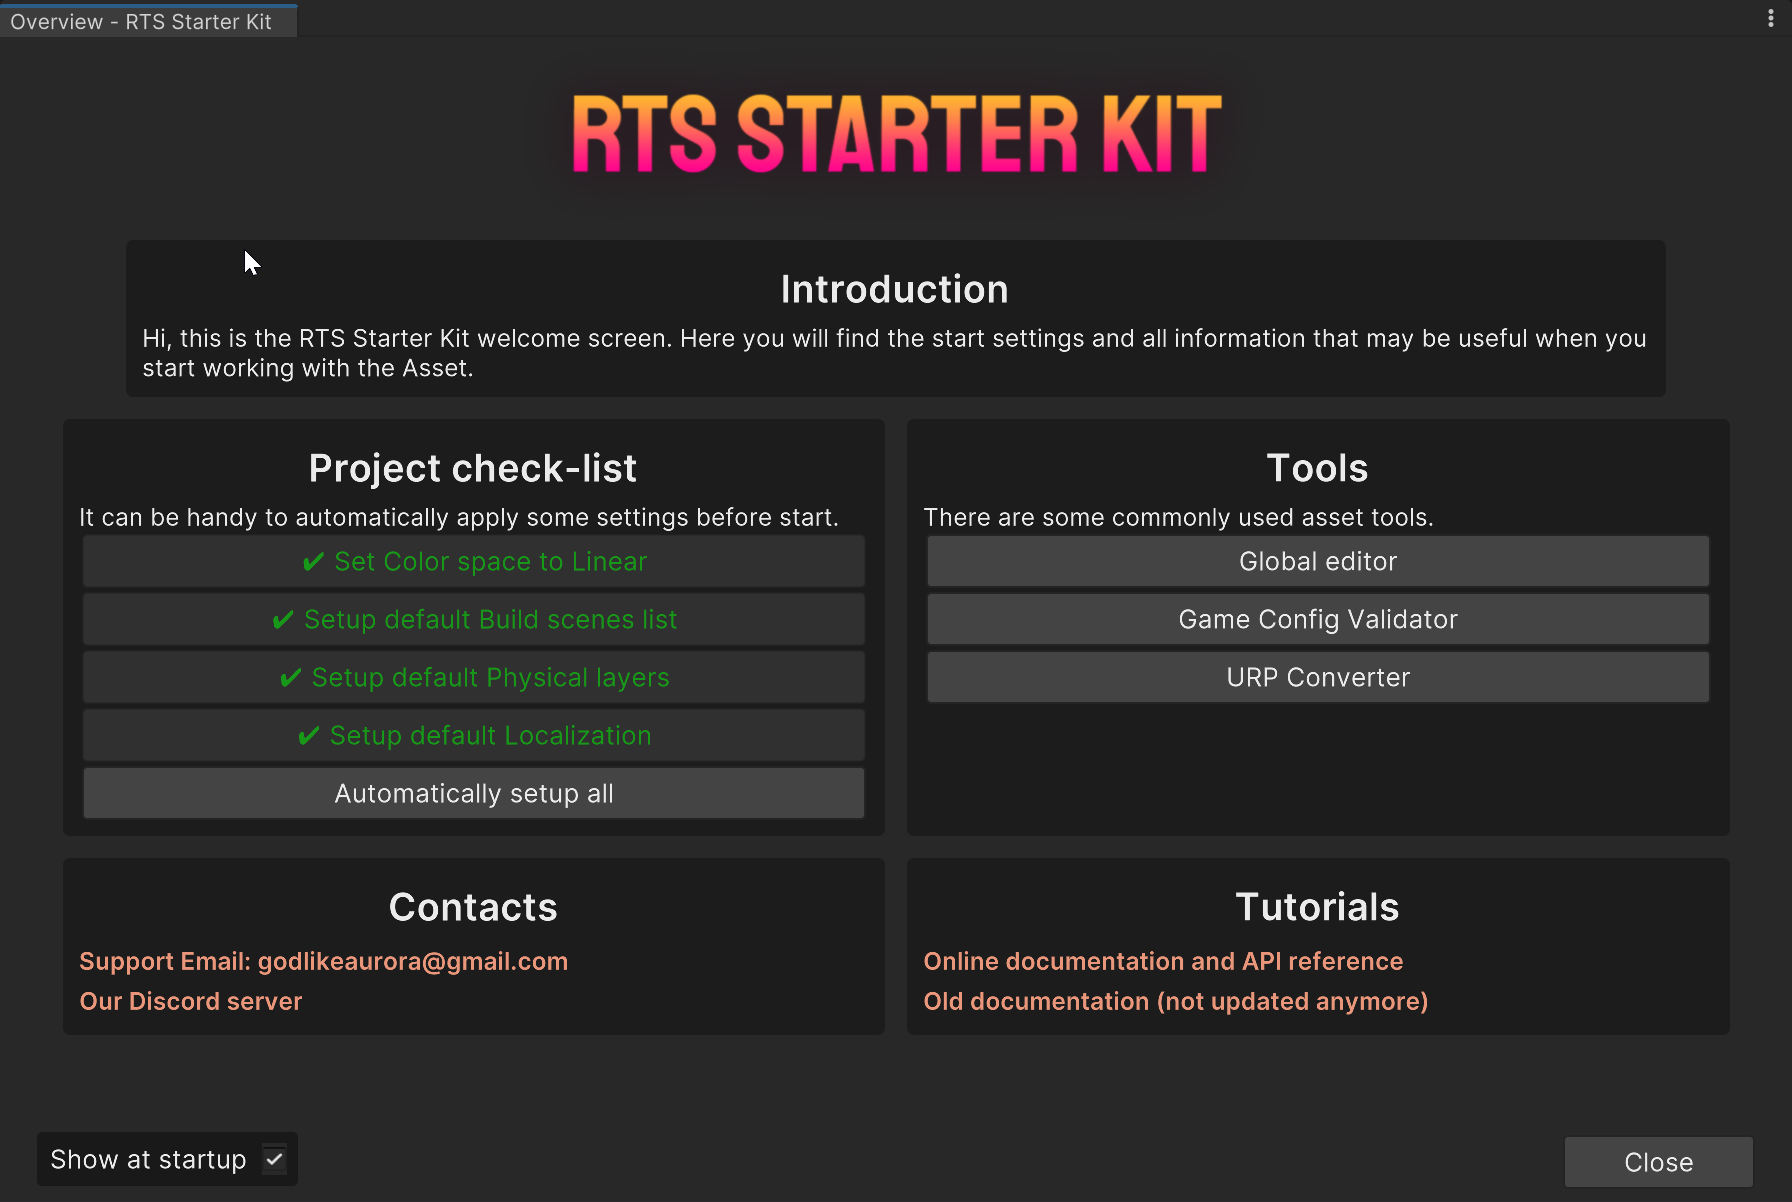
There is partition named Project check-list. Press Automatically Setup All button, and project should be initialized automatically.
// add link to the known issues
You can read partition Manual Setup below, if you want to know about what this tool does while automatical setup.
Text Mesh Pro
Note
Available from the 1.8.1 version.
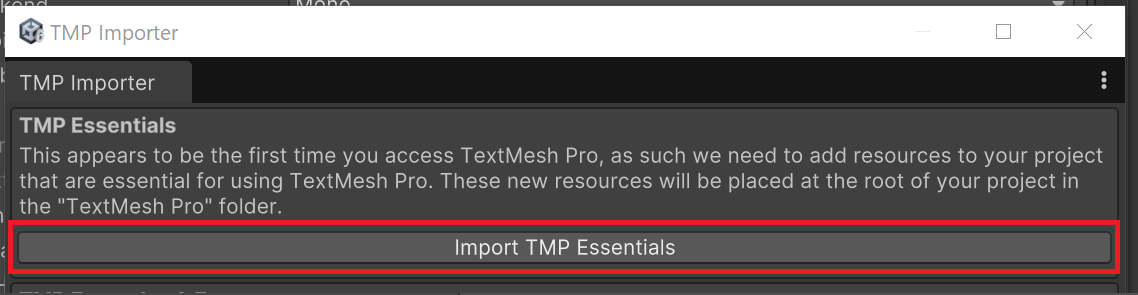
Text Mesh Pro requires some resources to work, and it will ask you to import them. Agree by clicking Import TMP Essentials.
Manual Setup
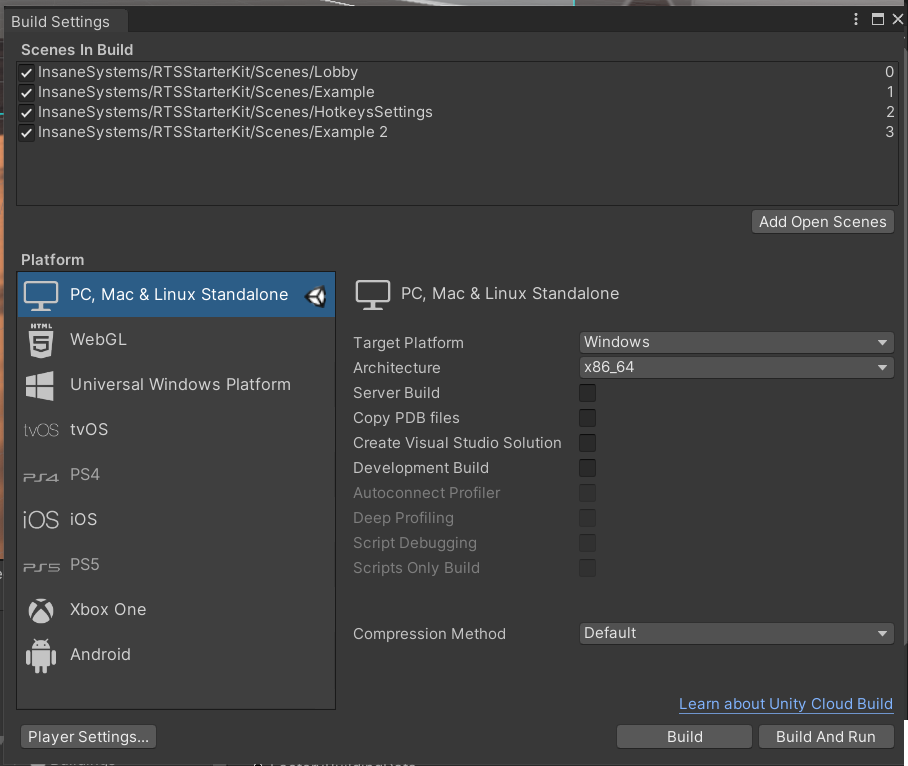
Firstly, to run the included game prototype, check that Lobby and Example scenes added to Build Settings. It should be done automatically by code, but if not, add it manually.
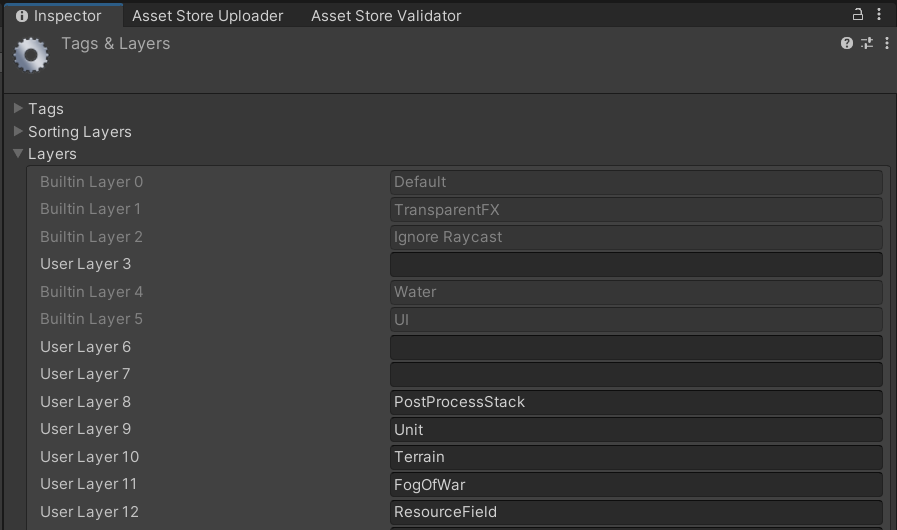
Next, you can check that the asset automatically added new layers from the table below.
RTS Kit Physical layers
Layer |
Description |
|---|---|
Unit |
Used to indicate all game buildings and units, a lot of physical calculations uses this layer |
Terrain |
Used to indicate a ground object on maps (terrain or something other) |
Fog of War |
Used for fog of war objects on scene |
Resource field |
Used for resource fields objects |
Reserved |
Some layers are reserved for future asset needs, do not use them please. |
Note
These fields should be filled automatically. if not - please, add these layers manually.
** Localization **
Note
Localization available from the 1.8.1 version. For versions below - ignore this part of the doc.
RTS Kit automatically manages localization settings. But if you have errors, associated with localization, check Project Settings -> Localization. There should be active LocalizationSettings asset set. If not, add it manually by clicking field and selecting asset from project files (there will be only 1 asset with this type).